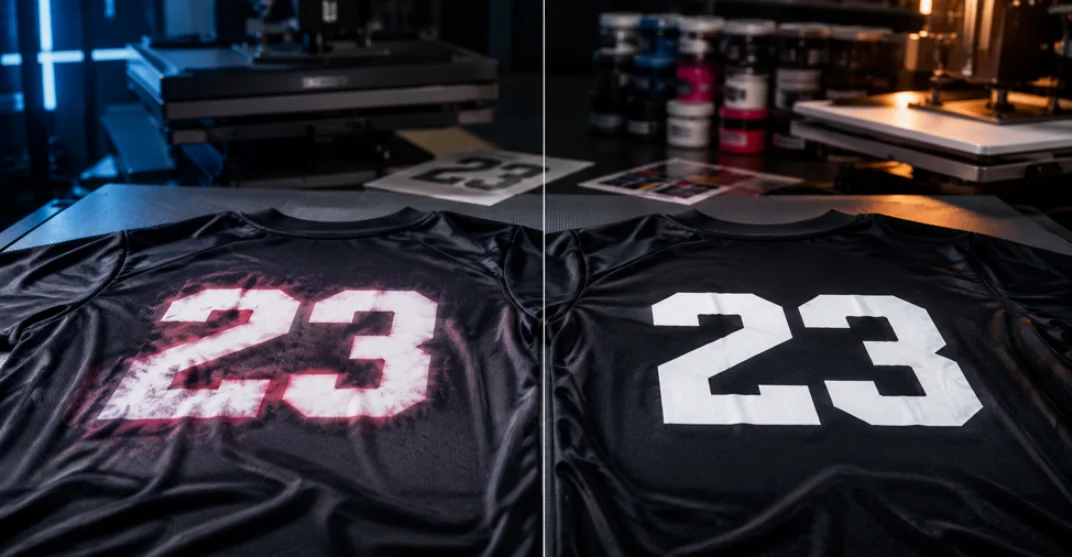
Print bleeding on polyester occurs when heat reactivates disperse dyes and moves them into the print. Low cure plastisol may cure at 260°F (127°C), while some polyester inks need 290–300°F (143–149°C). Keep heat at or below 320°F (160°C) only when approved by the ink manufacturer. Use low bleed ink, a compatible blocker underbase, accurate ink film measurement, and proper cooling before stacking.
A polyester print can leave the dryer bright and clean, then turn pink, blue, gray, or muddy the next day. This delayed failure is difficult to detect because dye movement may continue while the garment remains warm and the ink film settles.
Risk is often higher with dark colors, sublimated jerseys, recycled polyester, and lightweight performance fabrics. However, fiber content alone cannot predict the result. Dye lot, fabric finish, garment color, ink thickness, and repeated heating cycles can all affect print stability.
For printers, dye migration causes more than a color change. It can lead to rejected orders, wasted garments, inconsistent branding, and costly reprints. This guide explains how to identify high risk fabrics, select compatible printing materials, control production conditions, and approve the exact garment before completing the full order.
What Is Print Bleeding on Polyester?
Print bleeding is the unwanted movement of fabric dye into a printed design. Heat makes some dye molecules inside polyester active again. These molecules rise into the ink or transfer and stain it. The problem may cause:
- White ink to turn pink, gray, blue, or purple
- Light colors to become dull or muddy
- Colored shadows to appear inside a design
- DTF and heat transfer graphics to become tinted
- A clean print to change color after several hours
A thick layer of white ink does not always stop dye migration. The fabric dye can still pass through the printed layer.
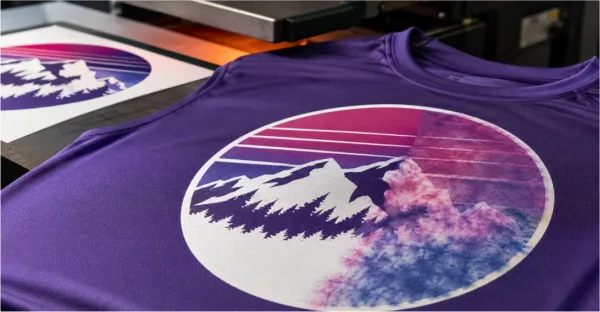
What Are Bleeds in Printing?
The word “bleed” has another meaning in paper and graphic printing. In graphic design, bleeds in printing are extra parts of an image that extend beyond the trim line. They prevent white edges after the paper is cut. In apparel printing, bleeding may describe dye migration, color contamination, ghosting, or spreading ink. These are different problems from paper-printing bleeds.
Why Does Polyester Print Bleed?
Polyester printing problems usually come from heat sensitive fabric dye, excessive heat, unsuitable ink, or an underbase that cannot block the dye.
Polyester Contains Disperse Dyes
Manufacturers commonly use disperse dyes to color polyester. These dyes enter the synthetic fibers during fabric production. High heat can reactivate some of the dye. It may then move from the fabric into the printed layer. The effect is often easy to see on deeply colored polyester shirts, including red, maroon, royal blue, and navy garments.
The Garment Receives Too Much Heat
Polyester may release more dye when exposed to unnecessary heat. High dryer settings, slow conveyor speed, long heat press times, repeated flashing, multiple dryer passes, and repressing can all increase dye migration. There is no universal curing temperature for polyester because the correct setting depends on the ink, fabric, garment color, print thickness, dryer, and application method. Complete these two checks before production:
- Read the technical data sheet: Check the required curing temperature, time, fabric compatibility, and application instructions.
- Measure the ink film temperature: Use a probe or temperature strip to confirm the ink’s actual temperature instead of relying on the dryer or heat press display.
For example, a conveyor dryer may be set to 300°F, but the printed ink may only reach 270°F. This could leave the ink undercured. In another case, the ink may become hotter than expected, increasing the risk of dye migration.
The Ink Is Not Made for Polyester
Standard plastisol ink may work well on cotton but fail on unstable polyester. Better options include low bleed ink, low cure plastisol, high opacity polyester white, poly white screen printing ink, and dye blocking ink systems.
Low bleed ink helps resist color contamination, while low cure ink reaches full cure at a lower temperature and may reduce dye activity. These inks lower the risk of migration, but no ink can guarantee success on every polyester garment.
The Underbase Cannot Block the Dye
A normal white underbase improves brightness and opacity. It may not stop strong polyester dye bleed. A dye blocker underbase creates a barrier between the fabric and the visible ink. Blockers are often gray, charcoal, or black because darker pigments can help stop migrating dye. The blocker and top ink must belong to compatible systems. Poor compatibility can lead to undercuring, cracking, or discoloration.
Some Garments Carry More Risk
Dye stability can vary between garment styles, colors, manufacturers, and production lots. Deeply colored polyester, sublimated jerseys, recycled polyester, lightweight performance fabrics, moisture wicking shirts, and certain polyester blends may carry a higher risk of dye migration.
Garments with an unknown dye history also require extra care. Test performance t-shirts and athletic t shirts before full production because similar looking fabrics may react differently under heat.
Common Signs of Dye Migration
Dye migration changes the color inside the design. It does not usually change the outer shape of the print. Common signs include:
- White ink turning pink on a red garment
- Light ink developing a blue or purple tint
- A print changing color overnight
- A shadow appearing after hot garments are stacked
- A DTF white layer becoming tinted
- A heat transfer graphic taking on the garment color
- One garment color failing while others print correctly
Do not confuse dye migration with other printing defects.
- Poor opacity means the fabric is visible through a thin ink layer.
- Undercuring may leave ink soft, sticky, or weak after washing.
- Overcuring can damage the ink or fabric.
- Ink spreading creates soft or blurry edges instead of changing the color inside the design.
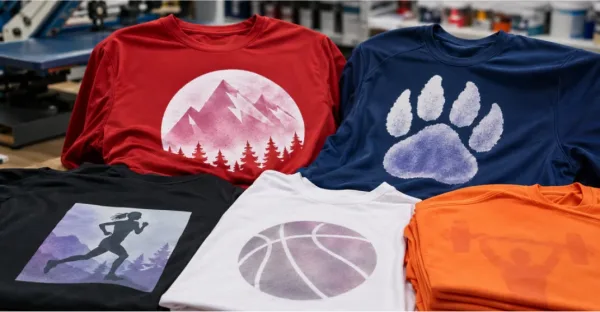
How to Prevent Print Bleeding on Polyester
Prevent print bleeding by testing the exact garment, choosing compatible inks, controlling every heat stage, measuring ink-film temperature, and cooling garments before packing or stacking.
1. Test the Exact Garment
Use the same garment style, color, ink, underbase, equipment, and settings planned for production. Inspect the sample:
- Immediately after curing, inspect the printed garment carefully.
- After it cools, check for early color changes.
- Inspect again several hours later for delayed migration.
- Recheck after twenty four hours for hidden dye movement.
- Wash test the sample when production requirements demand verification.
Do not test only a similar shirt. Two fabrics that look alike may use different dyes.
2. Choose a Suitable Ink System
Select the ink system based on the fabric and test result. A stable polyester shirt may only need low bleed ink. A dark or sublimated garment may require a blocker underbase beneath the visible print. Do not mix unrelated blockers and inks unless their manufacturers confirm compatibility.
3. Add a Blocker When Needed
Use a blocker when the sample shows strong migration or the garment is known to carry a high risk. A basic print sequence is:
- Print an even dye blocking layer across the garment.
- Flash briefly until the surface is ready for overprinting.
- Apply white or colored ink over the blocker.
- Cure the complete ink system exactly as directed.
- Move each printed garment into a cooling area.
Thin or broken areas in the blocker may allow dye to pass through. Professional screen printing services should match the garment, mesh, ink deposit, underbase, and cure settings before production.
4. Control Every Source of Heat
Each stage adds heat to the garment, so record machine settings and check their combined effect throughout the production process.
- Flash distance: Set proper distance to prevent overheating polyester surfaces.
- Flash time: Limit flash time to reduce unnecessary heat exposure.
- Conveyor speed: Adjust conveyor speed so ink cures without overheating.
- Heat press temperature: Use approved temperatures for selected polyester transfer materials.
- Pressing time: Keep pressing time within guidelines, limiting dye activation.
- Pressure: Apply only required pressure for proper transfer adhesion.
- Print locations: Plan print locations to reduce repeated garment heating.
- Heating cycles: Minimize heating cycles to prevent prolonged dye migration.
5. Measure the Ink Film Temperature
The dryer display shows the machine setting. It does not show the exact temperature inside the ink layer.
Use a suitable probe, temperature strip, or calibrated measuring tool during testing. Confirm that the ink reaches its required cure range without large temperature spikes.
This check is especially useful with thick ink deposits or garments that pass through several heating stages.
6. Cool Garments Before Packing
Polyester may remain hot after leaving the dryer or heat press. Stacking warm garments traps heat and can extend the time in which dye migration develops.
Use one of these cooling methods:
- Move garments through a cooling conveyor.
- Place them in a fan assisted cooling area.
- Lay them flat on a cooling table.
- Leave space between garments before folding or packing.
Do not place hot printed surfaces directly against other shirts. Cooling reduces trapped heat, but it cannot remove dye that has already entered the printed layer.
Pre Production Approval Check
Complete this approval check before production to confirm the garment, ink system, curing settings, and finished print meet all requirements.
- Confirm the fabric composition and supplier instructions.
- Test the exact garment style and color.
- Use the planned ink, blocker, and heating settings.
- Measure the actual ink film temperature during curing.
- Check the cooled sample again after 24 hours.
- Start production only after the sample passes.
How to Prevent Dye Migration in DTF and Heat Transfers
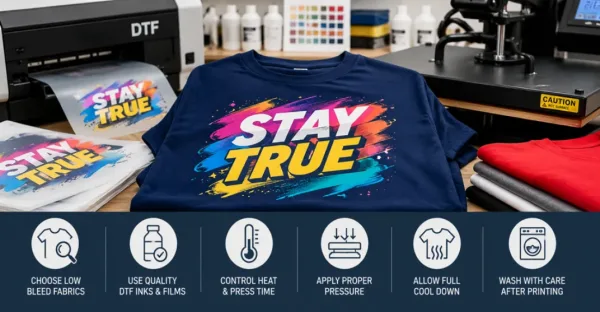
DTF and heat applied transfers can trigger dye migration because both methods use a heat press. Excessive temperature, pressing time, pressure, or repeated pressing may reactivate the garment dye.
Use transfer materials approved for polyester. Dark, sublimated, or unstable garments may need a low temperature or dye blocking transfer.
Before production:
- Test the exact garment style and color.
- Follow the transfer supplier’s temperature, time, pressure, and peeling instructions.
- Avoid repressing unless the supplier requires it.
- Let the sample cool completely.
- Check it again after 24 hours for delayed discoloration.
A standard transfer may work on one polyester shirt but fail on another. Testing is necessary because dye stability can vary by garment color and production lot.
Can You Fix a Polyester Print That Has Already Bled?
Severe dye migration usually cannot be removed from the original ink. Possible repair options include.
- Applying an approved blocker and opaque print layer
- Covering the damaged area with a suitable transfer
- Replacing the garment
- Correcting the settings before finishing the remaining order
The right choice depends on the design, garment, and existing ink deposit. Do not keep applying more heat without testing. Extra heat may release more dye or damage the fabric.
Dye Migration Problems and Recommended Solutions
Conclusion
Print bleeding on polyester can be prevented with the right testing, ink system, blocker underbase, and heat control. Always test the exact garment, measure the ink film temperature, and allow printed shirts to cool before stacking. These steps help reduce dye migration, discoloration, cracking, and failed production runs.
Careful planning also saves time, lowers material waste, and improves print consistency across large orders. The Apparel Factory offers polyester apparel and professional customization options for businesses, schools, teams, and event orders.
Frequently Asked Questions

Published on:
August 10, 2026