Tie dye with food coloring is a DIY method using household dye to color cotton fabrics through controlled folding and absorption.
- Soak in vinegar water: Prepare the fabric to maximize dye absorption.
- Keep damp: Wring out excess liquid to prevent bleeding.
- Fold and tie: Create patterns (spiral or crumple) tightly with rubber bands.
- Apply color slowly: Squeeze diluted food coloring onto sections.
- Flip and repeat: Dye both sides for full fabric penetration.
- Cure 6–12 hours: Wrap tightly in plastic to lock in pigment.
- Cold rinse and dry: Rinse until clear, then air dry in the shade.
Tie dye is one of the simplest ways to transform plain fabric into expressive wearable art. It does not require expensive tools or professional dye kits, which makes it popular for beginners, students, and DIY creators.
Using food coloring as a fabric dye alternative allows users to experiment with color patterns at home using easily available materials. However, the final result depends heavily on fabric type, moisture level, and how the dye is applied.
This guide explains the complete process step by step while also showing how fabric selection and preparation impact final color quality, especially when working with blank t shirts for customization used in DIY or apparel projects.
What You Need Before Starting
Before starting, prepare all materials and workspace carefully to control dye spread and ensure even coloring. Proper setup improves absorption, prevents patchy results, and gives cleaner tie dye patterns on fabric.
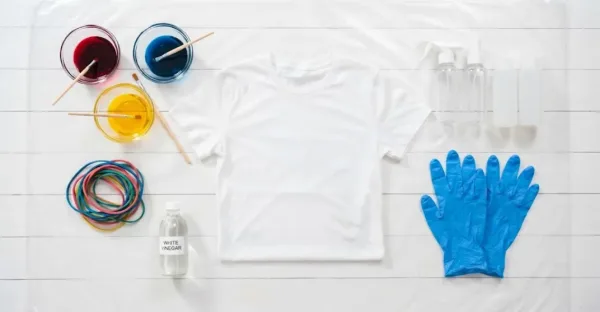
Materials Required:
- White cotton t shirt (pre washed for better absorption)
- Food coloring (gel or liquid types both work)
- White vinegar and clean water
- Rubber bands or string for binding
- Spray bottles or squeeze bottles for control
- Plastic gloves to avoid staining hands
- Plastic sheet or tray to protect surface
Preparation Insights:
- Lightly damp fabric ensures even and smooth color spreading
- Pre washing removes coating that blocks proper dye absorption process
- Flat working surface prevents unwanted dye flow and mess
- Dividing colors before starting improves overall pattern control accuracy
This step is often skipped but directly affects final print clarity.
Step by Step Tie Dye Process Using Food Coloring
This process controls dye absorption through fiber saturation, capillary action, and binding pressure. Moisture level and fold density directly impact how evenly food coloring penetrates cotton fabric structure.
- Soak shirt in vinegar water (10–20 min) opens cotton fibers for dye absorption and bonding
- Remove excess liquid but keep slightly damp controls capillary flow and prevents dye bleeding
- Choose folding style (spiral, stripes, crumple, fold) defines pattern structure and dye boundaries
- Tie tightly using rubber bands compression creates zones for controlled color separation
- Mix food coloring with small water ratio improves pigment flow and absorption consistency
- Apply colors slowly in sections prevents over saturation and color merging
- Flip shirt and repeat both sides ensures full penetration and balanced dye spread
- Wrap in plastic and rest 6–8 hours curing strengthens dye bonding with cotton fibers
- Rinse under cold water until clear stabilizes dye and reduces color loss
- Dry in shade for stable retention avoids heat damage and fading
Curing and rinsing stabilize dye molecules within cotton fibers, improving long term color retention and preventing early fading or bleeding.
Best Fabric Types for Color Absorption
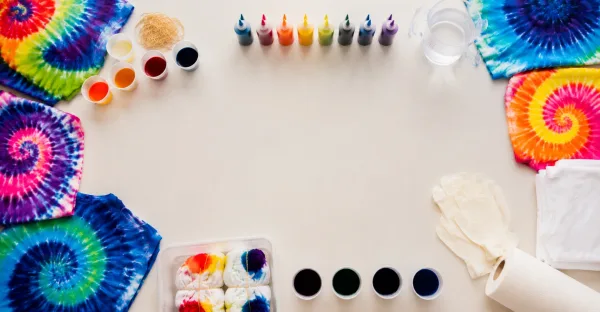
Fabric selection determines how dye molecules interact with fiber structure, affecting color vibrancy, penetration depth, and overall pattern clarity. Natural fibers absorb liquid dye through capillary action, while synthetic fibers resist bonding due to low porosity.
Creative Tie Dye Patterns You Can Try
Different folding techniques create unique dye movement, shaping final visual outcomes through controlled fabric tension, color flow, and absorption behavior during the application process.
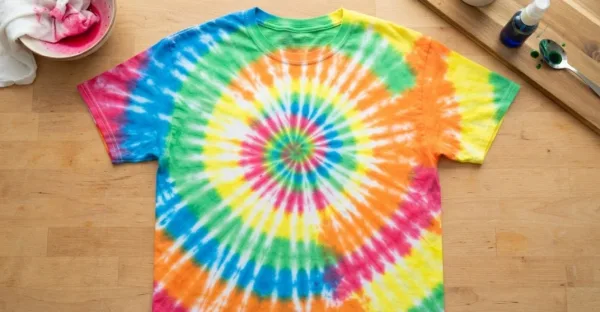
Spiral Pattern
Spiral pattern is a radial folding technique where fabric tension is created from a central twist point, allowing centrifugal dye dispersion and controlled circular symmetry formation on cotton fibers.
- Pinch the center of the shirt and twist it in a circular motion until it forms a tight spiral shape.
- Wrap rubber bands across the spiral like pizza slices to lock sections evenly.
- Apply food coloring in separate sections from center outward for balanced spread.
- Use slightly damp 100% cotton fabric for better absorption and dye diffusion.
- Tightness of twist controls sharpness of circular segmentation and dye flow.
- Bold circular design with high contrast spiral symmetry and defined color rotation.
Crumple Technique
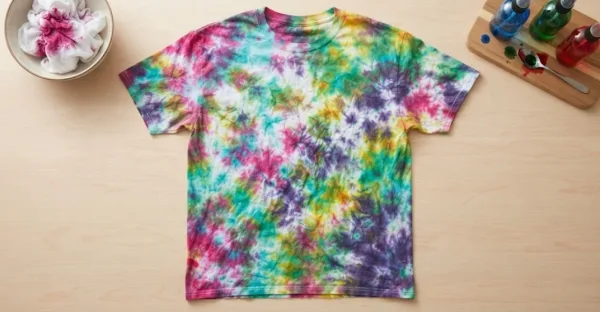
Crumple technique is a random mechanical compression method where fabric is irregularly folded, creating stochastic dye diffusion patterns driven by uneven surface tension and capillary absorption.
- Randomly scrunch the shirt into loose folds without any fixed direction.
- Lightly wrap rubber bands across sections to stabilize crumpled structure.
- Apply dye randomly allowing natural seepage into fabric folds.
- Slightly damp cotton improves diffusion and layered pigment absorption.
- Density of scrunching determines texture intensity and randomness level.
- Abstract organic pattern with free flowing and unpredictable color distribution.
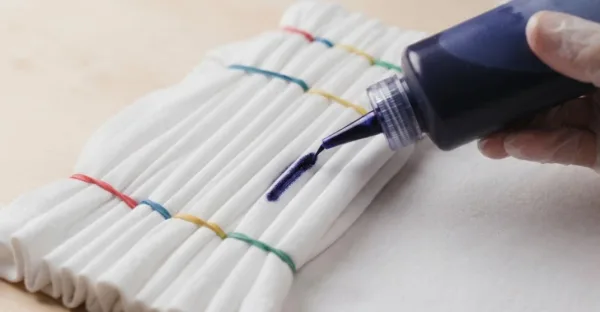
Stripe Folding
Stripe folding is a linear compression technique where fabric is folded into parallel segments, creating directional capillary channels for controlled dye migration and structured pattern alignment.
- Fold shirt repeatedly in straight vertical or horizontal accordion style lines.
- Place rubber bands at equal intervals to lock linear structure.
- Apply dye along folded edges for controlled directional absorption.
- Pre-washed cotton ensures stable fiber structure for clean stripe formation.
- Fold precision controls stripe sharpness and symmetry quality.
- Clean linear pattern with structured and uniform directional design
Bullseye Pattern
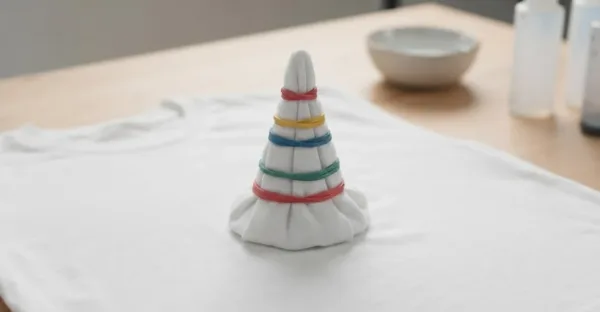
Bullseye pattern is a concentric radial binding method where fabric is tensioned from a single focal point, enabling circular diffusion gradients through controlled dye penetration zones.
- Pinch one point and pull upward into a cone shape.
- Wrap rubber bands at equal distances to create circular segments.
- Apply dye section wise to maintain clear ring separation.
- Damp cotton fabric improves radial absorption consistency.
- Binding tightness controls clarity of circular ring formation.
- Strong concentric circular design with defined target like symmetry.
Gradient / Blend Style
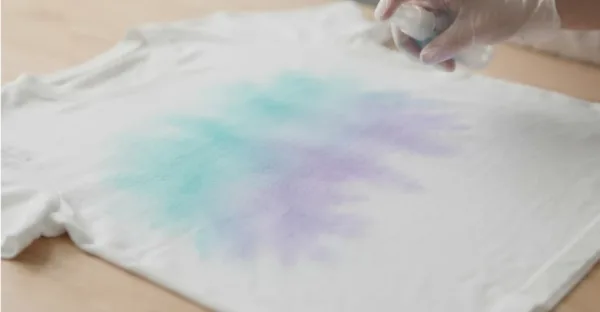
Gradient or blend style is a diffusion based dyeing technique where pigments migrate through fiber capillary action without structural restriction, creating smooth tonal transitions across textile surfaces.
- Leave the shirt flat or loosely folded without tight binding.
- Minimal or no binding to allow free color movement.
- Apply diluted dye gradually using spray or squeeze method.
- Slightly damp fabric enhances smooth color blending.
- Application speed controls gradient softness and transition smoothness.
- Watercolor like soft blend with seamless color transitions and fading tones.
Common Mistakes and How to Fix Them
Many tie dye failures happen due to small technical errors affecting color quality, pattern clarity, and overall fabric absorption during the dyeing process.
- Over wetting fabric causes washed out colors and weak pigment retention
- Loose binding leads to blurred and uneven pattern formation
- Too much dye creates muddy color mixing and dull results
- Uneven application causes patchy design areas across fabric surface
- Short setting time results in weak color bonding and fading
Fixing Tips
- Always test color strength before applying on full shirt
- Keep fabric sections separated to maintain clean pattern edges
- Allow sufficient curing time for proper dye absorption process
- Apply color in controlled layers instead of heavy saturation
How to Make Colors Last Longer on Shirts
Proper curing, washing, and storage techniques improve dye bonding strength, reduce fading, and help maintain vibrant tie dye colors on fabric longer.
- Use vinegar soak to improve fabric fiber bonding strength
- Let shirt cure fully for six to twelve hours minimum
- Always rinse fabric using cold water to stabilize dye particles
- Avoid using detergent wash during first forty eight hours after dyeing
- Air dry shirt naturally instead of using heat based machine drying
Extra Tip: Store shirt away from sunlight to prevent early fading damage
DIY vs Professional Fabric Printing
Conclusion
Tie dye with food coloring is a simple and creative way to customize plain shirts at home without needing expensive dye kits or advanced tools. The final outcome depends on fabric type, folding technique, dye control, and proper curing time, making each design unique and expressive.
For better results and more consistent color performance, choosing high quality blank t shirts for customization is essential, especially when experimenting with different patterns or scaling designs.
If you want to explore more apparel customization techniques, The Apparel Factory provides insights and solutions for both DIY creators and bulk clothing needs, helping bridge the gap between creativity and professional garment production.
Frequently Asked Questions

Published on:
July 2, 2026