


Have you ever pulled your favourite vintage tee or a custom-branded hoodie out of the dryer only to find the graphic looking like a spiderweb of cracks? It’s a heart-breaking moment for any apparel lover. Whether it’s a sentimental concert shirt or a high-end streetwear piece, screen print cracking (often called “crocking” in the industry) is a common frustration.
The good news? You don’t have to demote that shirt to a “sleeping tee” just yet. As an apparel specialist, I’m going to walk you through the science of why this happens and provide a professional-grade, 5-step DIY restoration strategy to bring your graphics back to life.
The Science: Why Does Screen Printing Crack?
Before we dive into the fix, we need to understand the “why.” Most commercial screen printing uses Plastisol ink. Unlike water-based inks that soak into the fabric fibers, Plastisol is essentially liquid PVC (polyvinyl chloride). It sits on top of the fabric.
Cracking typically occurs due to:
-
Under-Curing: If the ink wasn’t heated to exactly 320°F (160°C) during production, it never fully bonded.
-
Low Elasticity: Budget-grade inks lack the plasticizers needed to stretch with the fabric.
-
High-Heat Laundering: Repeated exposure to high-heat dryers makes the PVC brittle.
-
Fabric Stress: Lower GSM (grams per square meter) fabrics stretch more than the ink can handle, causing the print to split.
Does Every Cracked Print Need Replacing?
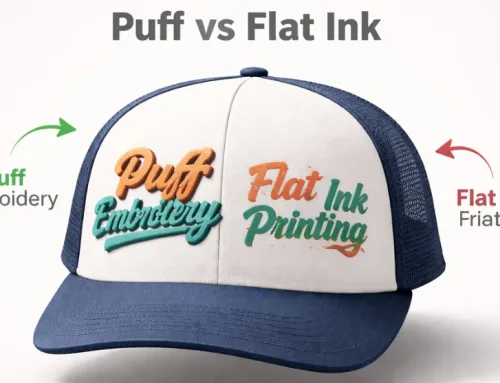
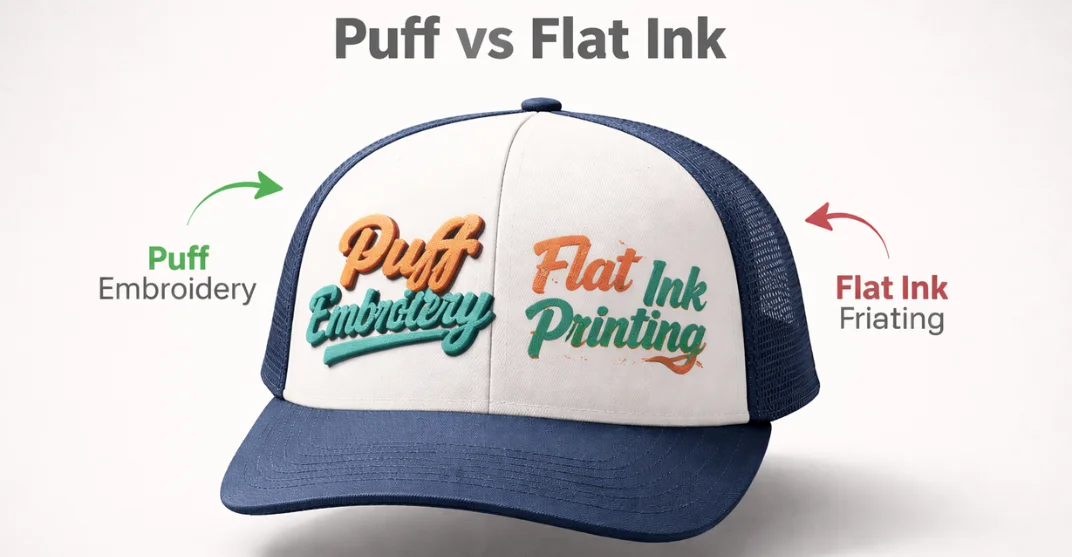
If the ink is simply cracked but still adhered to the shirt, it is fixable. However, if the ink is “flaking” or “peeling” (falling off in chunks), the bond is lost, and a DIY heat-fix won’t be permanent. In such cases, switching to more durable decoration methods like 3D Puff Embroidery might be a better long-term choice for your brand. For standard hairline cracks, the following method is the gold standard for home restoration.
How to Fix a Cracked Screen Print: The 5-Step Professional DIY Method
To get professional results at home, you need to mimic the industrial process of “reflowing” the ink.
Step 1: Surface Preparation and Cleaning
The success of a screen print restoration depends entirely on how well you prepare the “substrate” (the garment) before applying heat. If you attempt to fuse the ink while it’s dirty, you will permanently trap debris inside the print, creating a rough, uneven texture that will likely crack again.
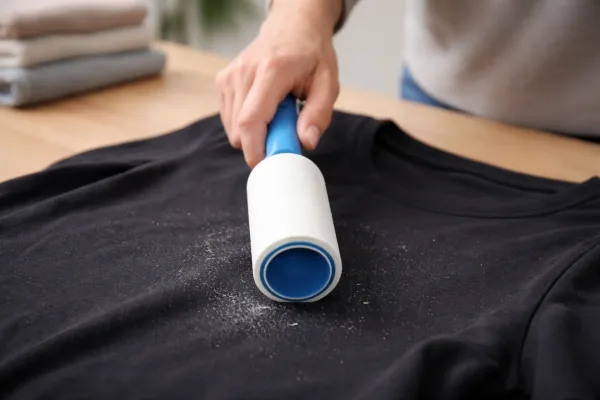
Deep Cleaning: The Lint and Dust Barrier
Over time, household dust, pet hair, and microscopic lint from other laundry settle into the hairline cracks of your graphic.
The Hazard: When you apply heat, these fibers become embedded in the melting Plastisol ink. This prevents the edges of the cracks from bonding together properly.
The Fix: Use a high-tack lint roller over the entire graphic area. Roll in multiple directions vertical, horizontal, and diagonal—to ensure you pull debris out from the deep “valleys” of the cracks. For stubborn lint, a piece of masking tape can also be used to “dab” the specific areas.
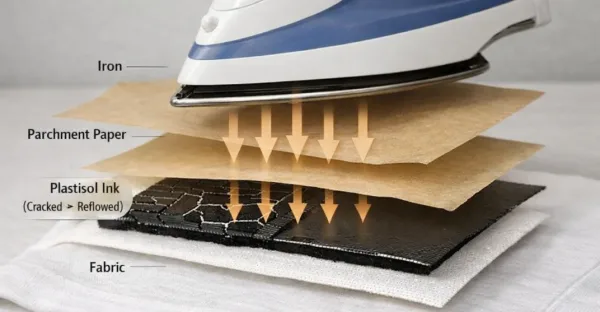
Step 2: The Protective Barrier (Parchment Paper)
At this stage, you are dealing with the most critical safety precaution of the entire restoration process. Most commercial screen prints are made with Plastisol ink, which is essentially a suspension of PVC (plastic) particles in a liquid plasticizer. When you apply a hot iron directly to this ink, the plastic will melt instantly, bonding to the metal plate of your iron and permanently smearing the design on your shirt.
The Secret Tool: Why Parchment Paper?
To safely “reflow” the ink without destroying it, you must use a professional-grade barrier. Parchment paper (the non-stick silicone-coated kind used in baking) is the industry-standard “cheat code” for home DIYers for two primary reasons:
-
Thermal Stability: It can withstand temperatures up to 450°F (232°C) without burning or melting, allowing the iron’s heat to pass through cleanly into the cracked ink.
-
Non-Stick Silicone Coating: Unlike regular paper, parchment paper has a thin silicone layer that prevents the softening Plastisol from sticking to the sheet. This allows the heat to distribute evenly across the cracks, fusing the edges back together without lifting the print off the fabric.
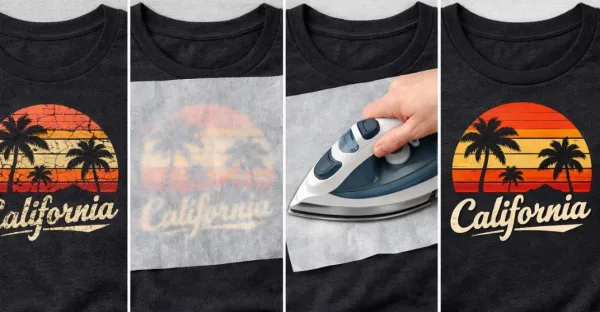
Step 3: The Controlled Heat Application
This is the most critical stage of the restoration process. Think of this step as “re-manufacturing” the print. Since the original cracking was likely caused by under-curing or loss of elasticity, you are now using controlled thermal energy to manually “reflow” the Plastisol ink back into a solid, cohesive layer.
Calibrating Your Heat Source: The “Zero Steam” Rule
Precision temperature control is what separates a successful repair from a ruined garment.
-
The Setting: Set your household iron to a Medium-High (Cotton) setting. Most Plastisol inks require a temperature of approximately 320°F (160°C) to reach their fusion point.
-
Why Zero Steam? This is a non-negotiable rule. Steam introduces moisture and pressurized humidity into the fabric fibers. If water vapor gets trapped under the parchment paper while the ink is softening, it will cause the print to bubble, blister, or “delaminate” (lift away from the shirt). Always ensure your iron’s water reservoir is empty or the steam function is completely deactivated.
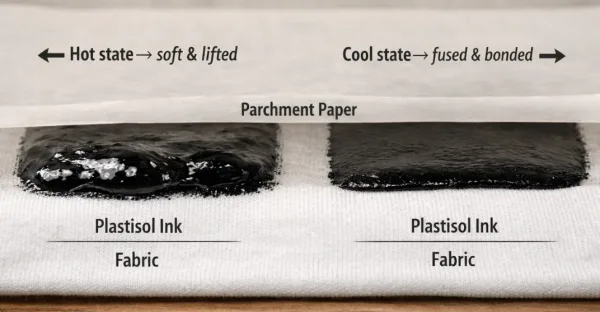
Step 4: The Cooling and Setting Phase
This is the most overlooked phase of screen print restoration, yet it is where the permanent “repair” actually happens. In the industry, this is known as the fusion set. When you apply heat in Step 3, you turn the solid Plastisol ink back into a semi-liquid state. If you disturb it while it’s still molten, you risk ruining the entire graphic.
The Danger of the “Hot Peel”
Many DIYers are eager to see the results and peel the parchment paper off immediately after removing the iron. This is a mistake known as a “Hot Peel” failure.
-
The Science: While the ink is hot, its bond to the parchment paper is often stronger than its bond to the fabric fibers.
-
The Consequence: If you pull the paper while the ink is liquid, you will lift the design right off the shirt, or worse, create “peaks” in the ink that leave the texture feeling rough and “hairy.”
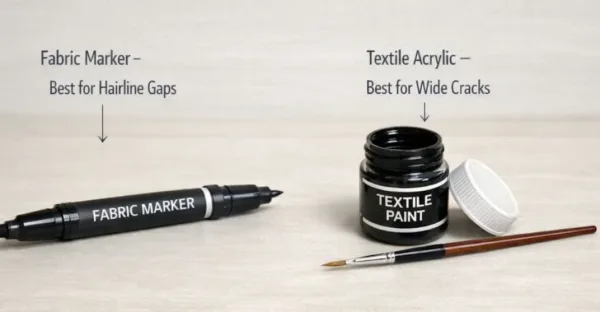
Step 5: Detail Work with Textile Pigments
For deep cracks where the ink has actually separated, heat alone might not be enough.
-
The Pro Fix: Use a high-quality Fabric Marker or a small amount of Textile Acrylic Paint that matches the color of the print.
-
Apply the pigment into the cracks using a fine-tip brush.
-
Once dry, repeat Step 3 to heat-set the new pigment into the old print. This creates a permanent, wash-fast bond.
In cases where a garment has suffered from severe “ink loss” or deep, wide gaps, heat application alone may not be enough. While Step 3 and 4 successfully “reflow” the existing Plastisol, they cannot replace ink that has physically flaked off. This final step is what separates a basic DIY attempt from a professional-grade restoration.
Choosing Your Pigment: Markers vs. Acrylics
Depending on the size of the repair, you have two primary options:
-
Fabric Markers (Best for Hairline Gaps): High-quality, dual-tip fabric markers are excellent for precise work. They are easy to control and don’t require mixing.
- Textile Acrylic Paint (Best for Larger Voids): For wide cracks or missing chunks, use a dedicated textile acrylic. Unlike standard craft paint, textile paints contain a fabric medium that keeps the pigment flexible once dry, preventing the new repair from cracking immediately.
Quick Guide to Fixing Screen Prints
To fix a cracked screen print at home, place parchment paper over the design and apply a dry iron on medium-high heat for 30 seconds. This process, known as “reflowing,” softens the Plastisol ink, allowing cracks to fuse back together. For best results, allow the ink to cool completely before removing the paper.
Critical Maintenance: How to Prevent Future Cracking
Restoration is great, but prevention is better for the longevity of your wardrobe. To keep your custom apparel pristine, follow these industry-standard care instructions:
1. The “Inside-Out” Rule
Always flip your shirts inside out before washing. This protects the graphic from the abrasive friction of other clothes, zippers, and buttons in the machine.
2. Cold Water Only
High temperatures are the enemy of ink elasticity. Cold water keeps the PVC structure of the print stable and prevents the fabric from shrinking away from the design.
3. Skip the Dryer (Air Dry is King)
The mechanical tumble and intense heat of a dryer are the leading causes of print degradation. Hang-drying or laying the garment flat is the single best thing you can do for your custom apparel.
4. Choose High-GSM Fabrics
When sourcing wholesale t-shirts, look for higher GSM ratings (e.g., 240 GSM or higher). Heavier fabrics provide a more stable “substrate” for the ink, meaning the fabric stretches less, and the print remains intact for years longer than on thin, cheap cotton.
Technical Comparison: DIY vs. Professional Restoration
Conclusion: Value Your Apparel
Fixing a cracked screen print is more than just a chore; it’s about sustainability and valuing the quality of the garments you own. By understanding the relationship between heat, ink, and fabric weight, you can extend the life of your favourite pieces by years.
Next time you see a crack forming, don’t panic. Grab your parchment paper, set your iron, and give your favourite tee the “reflow” treatment it deserves.
Frequently Asked Questions

Published on:
March 25, 2026

